Hi There, first i would like to say hi to everyone.
i would like to share a tutorial making an android login screen animation with Kodular,
For now, let’s try to create a Login Screen and we will use the animation component to make it more interesting. So this is a list of components that you will use :
- Vertical Scroll Arrangement
- Space
- Image
- Label
- Text Box
- Button
- Animation Utilities
Before continue into the tutorial, don’t forget to prepare
- PC or Laptop
- Web Browser
- Coffee / Tea
- Enjoy
PREPARING THE SCREEN
First open Kodular.io, sign in or register if you are a new user. Then create the new project and type the name, after that follow this step
- Write your application name
- After that write your package name
- Find a good background image here is the example :
- Upload the image by clicking the assets menu and upload image. We will use this image for a background of our login screen.

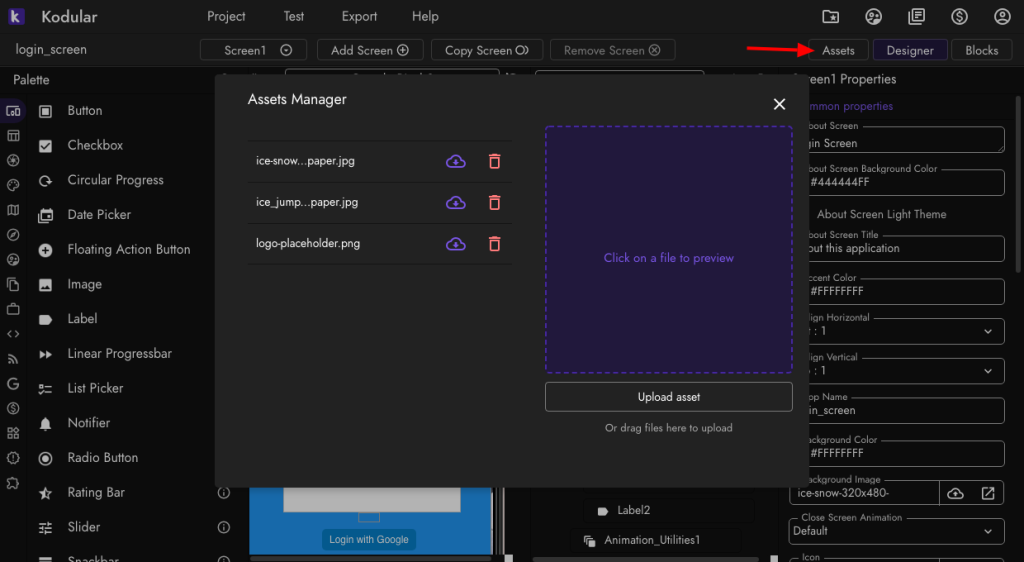
Assets Menu
- Click the Screen1 find the background image, choose the image
- Find the app name, change the app name into “Login Screen”
LAYOUT
Now we are moving into layout, what we gonna do is to make the screen have a background Image, a Logo, and a container of form for login. First remove the title bar and status bar from screen, uncheck the show options menu, show status bar and title visible. This make a full screen application,

Next, choose layout palette from the left side and choose the vertical scroll arrangement component drag into the application and rename the component into “ logoContainer “. This component is a container with vertical alignment and if the content height exceeds the screen, we can scroll the content to the bottom.

Drag the image component to the logoContainer , and use this image
and upload to the assets, choose the image component from hierarchy components find the picture properties change into the Logo image, we are using this image Logo as placeholder. Drag space component and put inside the logoContainer , put above of the logo image component.
Drag a new vertical Scroll Arrangement, and put below the logoContainer , rename the component into loginButtonContainer , drag the Label component put inside into loginButtonContainer .
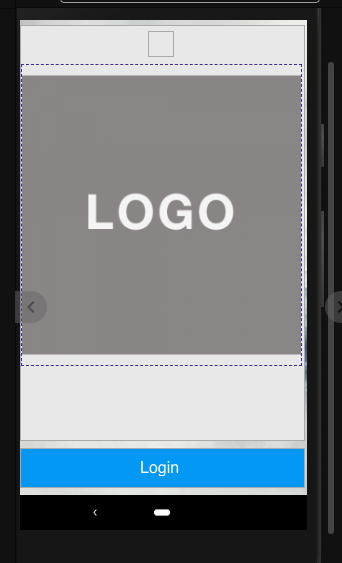
UI Login Screen
Try to make the UI look like a picture above. Feel free to change the width, height of the container or the component
Properties
- Space → height = 10%, width = automatic
- image component → height = 30%, width = fill parent
- logoContainer → height = fill parent, width = fill parent, Align Horizontal = center
- loginButtonContainer → Align Horizontal = center, Background color = #0398F3FE, Clickable = true (Checklist), Height = 8%, Width = fill parent
- Label → font size = 18, Text = “Login”
Now, drag new Vertical Space Arrangement, put below loginButtonContainer and rename into loginFormContainer .
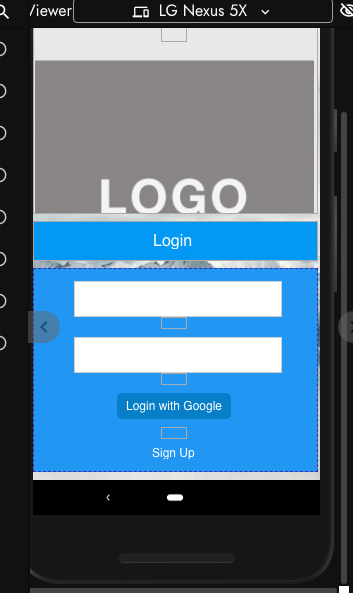
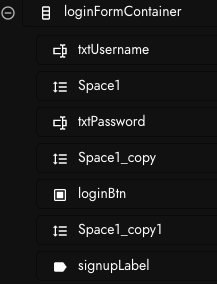
Make the loginFormContainer look like the picture above, put the text box component, button component, label component and use space component to provide spacing between components. Then uncheck the checkbox visible property loginFormContainer , you will see the screen like this
UI Login Screen
Drag the animation utilities component into application. Now we will move to blocks section to make some cool animation.
BLOCK
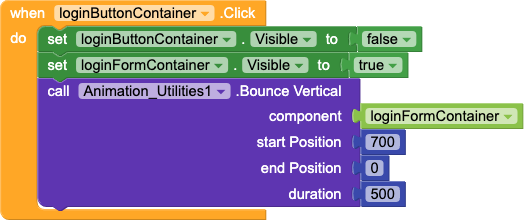
This the animation block, this block will make animation when loginButtonContainer has been clicked.
How it works.
- Click Login Container
- Hide LoginButtonContainer
- Show loginFormContainer
- Animate loginFormContainer from bottom to middle with bounce animation
HOW ABOUT LOGIN FUNCTION?
Let’s make it more interesting, how about to add a simple login function. Drag notifier component into application, we will use this to show a message if we successfully login.

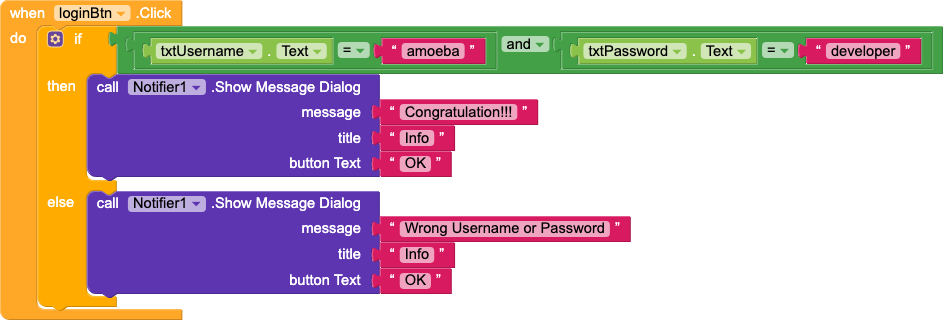
Block When Button Login Clicked
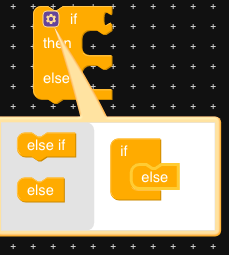
drag if-then block from control , change the block into if-then-else block, click the gear, and drag else block into inside if block.
How it works
- Login Button Click
- it will compare the username and password value, if txtUsername value equal with “amoeba and txtPassword value equal “developer”
- then show message with notifier component, show congratulation message
- else show the wrong message
LIVE TEST

Live Test Login Screen Animation
It’s time to test to device, click test menu from browser → connect companion. Open companion app kodular from your device and scan the qr code or insert the code number. Click the Login and you will see the animation showing form login, from bottom to top with bouncing. Try to insert the username and password to see the message notification.
Download Link AIA
login_screen.aia
Download Link APK
login_screen.apk
Liked my work
If you liked my work or think it is useful then you can motivate me to make tutorials like this by visiting my blog https://amoebadev.home.blog
Thank you.