Welcome Everyone, Today in this guide I will show you how to use instamojo api using Kodular in-built Web Component.
So Let’s Begin ;
Step 1 ;
Create an account on https://www.instamojo.com (for live credentials), https://test.instamojo.com (for test credentials).
Step 2 ;
Go to Side menu ![]() API & Plugins
API & Plugins ![]() Now you will get Private API Key and Private Auth Token.
Now you will get Private API Key and Private Auth Token.
Step 3 ;
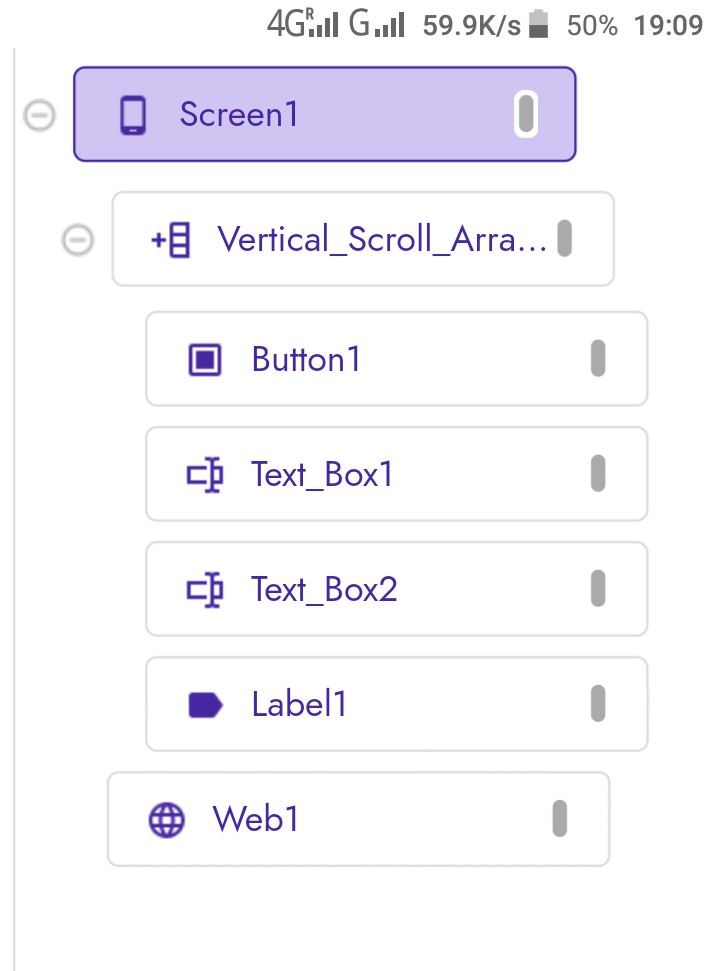
COMPONENTS
Import below Components ;
Step 4 ;
BLOCKS
Use Below Blocks ;


Here Web URL must be https://www.instamojo.com/api/1.1/payment-requests/ (for live credential) or https://test.instamojo.com/api/1.1/payment-requests/ (for test credential).
Note : Payment Purpose and Price is required and can’t be empty and Price must greater than 9 INR.
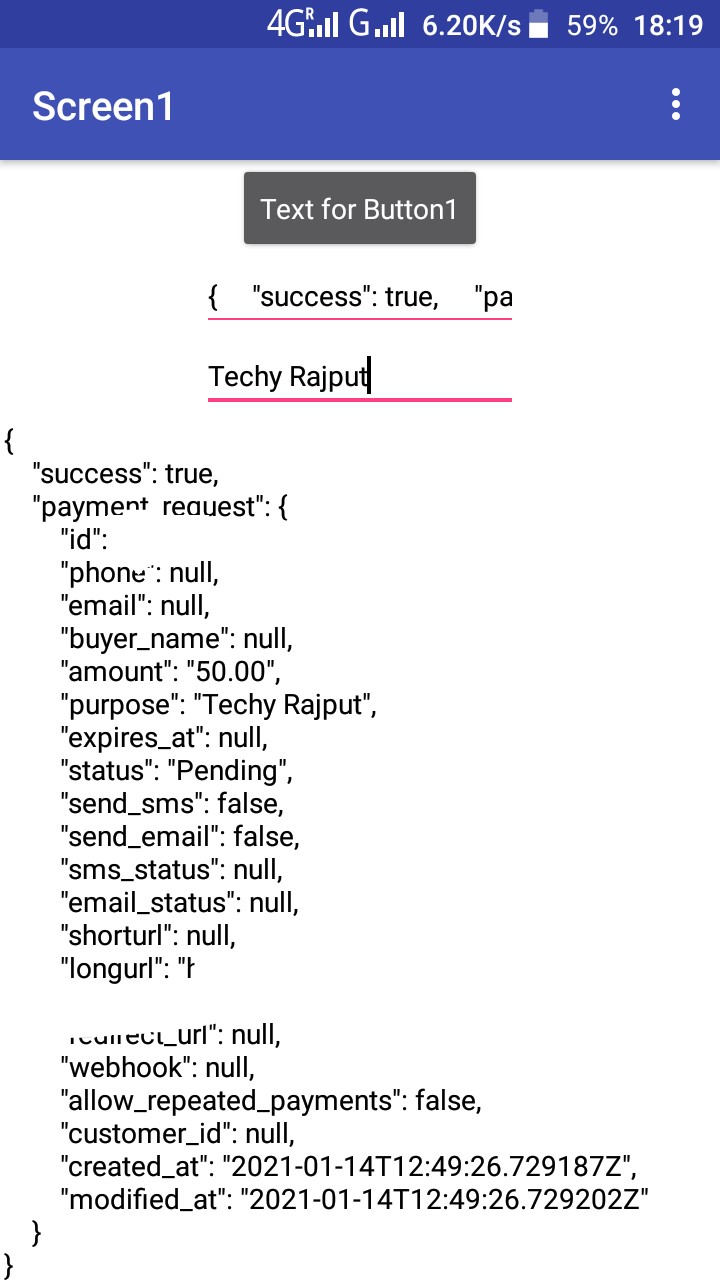
By using this guide you will get json response.
Screenshot ;
AIA (PAID)
Contact to get full working aia with webviewer.
If you have any question, don’t hesitate to ask me and Provide your valuable feedback.
If you like my work and use my guide in your project or make YouTube video then please provide full credit with my site link (https://rajputtechy.wordpress.com)
Donate Here :
About Instamojo
Instamojo is one of the top rated payment gateway & eCommerce platform in India.

