Hello everyone, Thanks for stopping by this post.
In this post I’m going to share how you can make a custom snackbar by using a trick.
As I always says, “Possibilities are endless”. There’s always different ways to achieve anything.
So, This is what I’ve tried to make a custom snackbar
---- [Start of Tutorial] ----
First of all, let me tell you, I’ve used FloatingActionView extension (made by @Atom_Developer) and for animating the snackbar, I’ve used another most famous extension Phase made by @Shreyash.
Let’s talk about design first.
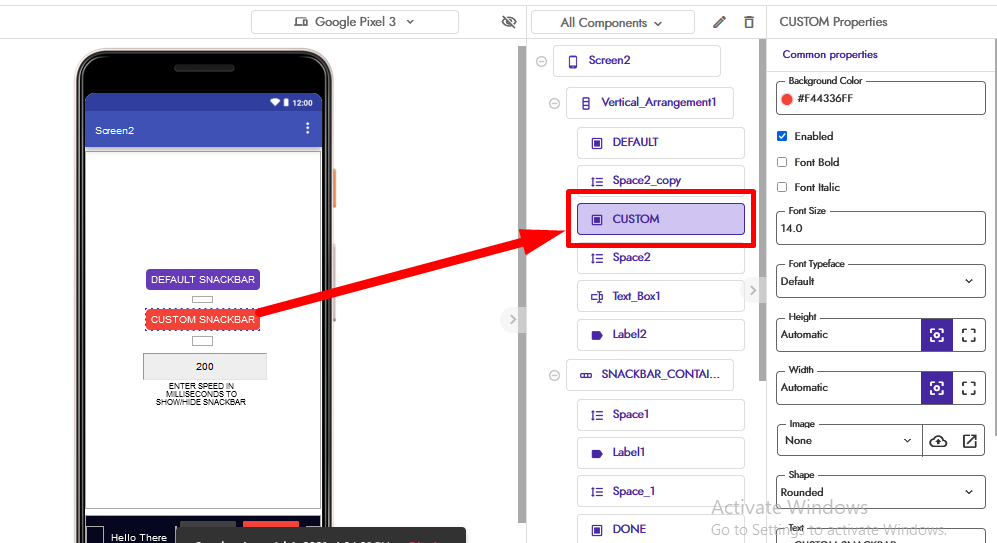
I’ve used Horizontal Arrangement for designing the outer part of the snackbar and one Label & 2 Buttons for cancel & done and used some spaces to make a perfect design
Properties of components 
-
Horizontal_Arrangement1 (Named as - SNACKBAR_CONTAINER)
– Align vertical = center
– Background color = dark blueish
– Height = 54px
– Width = fill parent-
Space1 - (Left space)
– Width = 20px -
Label1 - (Label for title)
– Font size = 14 px
– Text color = white
– Text = Hello there (or your choice text) -
Space_1 - (Middle space to keep the title and buttons separated)
– Width = Fill parent -
Button1 - (Button Done)
– Background Color = #414141FF (or your choice color)
– Font size = 12px
– Height = 40px
– Width = 70px -
Button2 - (Button Cancel)
– Same properties as Button Done except background color
– Background Color = #F44336FF (or your choice color) -
Space_2 - (Right space)
– Width = 20px
-
Reference Image ![]()

For this demo purpose I’ve used a button (named as CUSTOM) to trigger this Snackbar
Blocks Part
Step 1
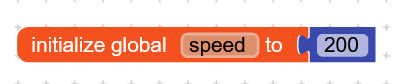
make a global variable speed to control speed of SnackBar
(Speed is in milliseconds)
Step 2
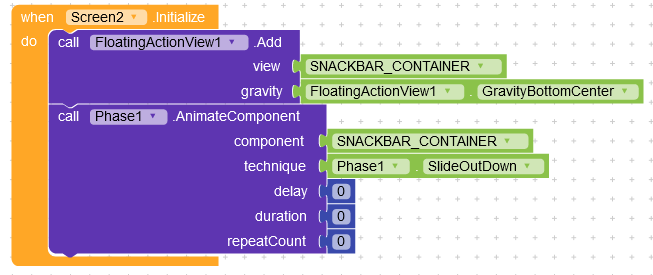
Add Horizontal Arrangement (SNACKBAR_CONTAINER) to FloatActionView with gravity GravityBottomCenter and hide this container using AnimateComponent block of Phase
Step 3
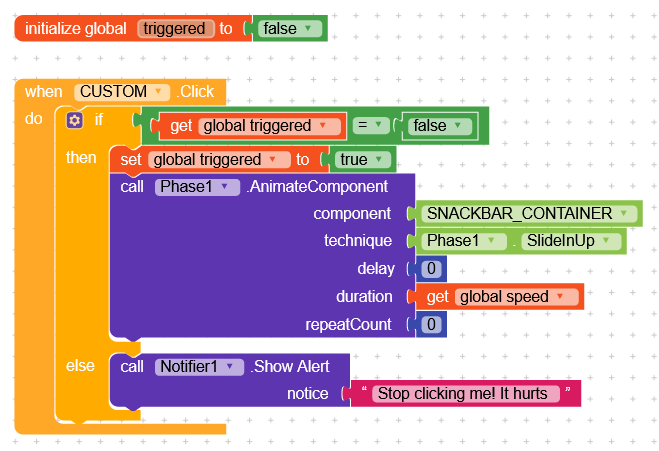
On CUSTOM Button trigger/click event, use the AnimateComponent block to animate SnackBar to make visible. and I used the extra global variable (triggered) to prevent triggering SnackBar again and again, when user click multiple time (see reference image below)
Step 4
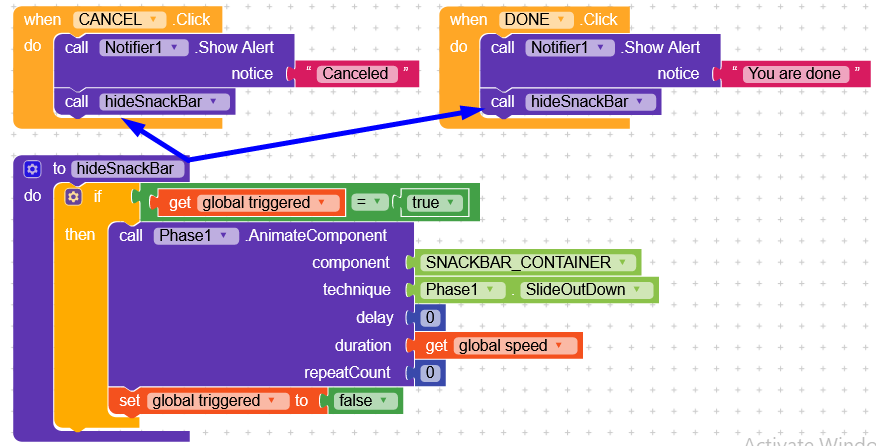
And in the last step, triggered Notifier and hide the SnackBar on clicking Done or Cancel button. I’ve used a procedure to prevent repeat same blocks twice by using DRY formula (Don’t Repeat Yourself) (see reference image below)
---- [End of Tutorial] ----
AIA File
CustomSnackbar.aia (115.4 KB)
This is it for now. I hope it will be very helpful guide for you. and will see you in the next guide very soon