Unfortunally it doesnt work, u have another idea?
What about providing a screenshot of your relevant blocks?
Taifun
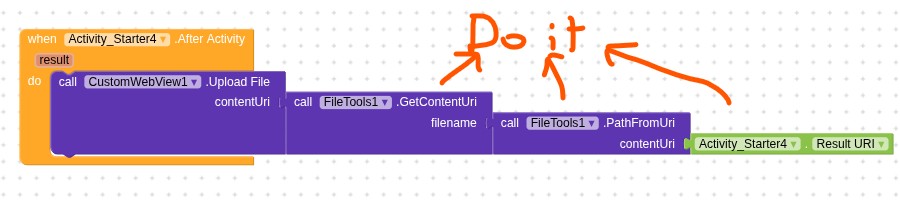
please provide the Do it results
use Do it together with the companion app to debug your blocks, see also tip 4 here App Inventor: How to Learn | Pura Vida Apps
see also Live Development, Testing, and Debugging Tools
Taifun
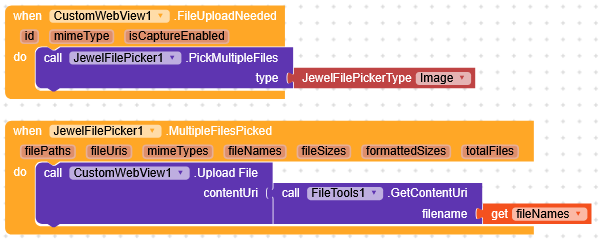
you might want to try this example
protip: you can do a search in the custom webviewer thread and community yourself to find some examples how to upload a file using the Custom Webviewer extension
Taifun
Hello Taifun,
Thank you very much for the blog system. Unfortunately, it’s not working. It worked for a short time, but now, for some reason, it doesn’t work anymore. I’ve looked everywhere and checked all forums to find a solution, but I couldn’t find anything. That’s why I would really appreciate it if you could help me again.
I also have two more requests: it would be great if it could upload or process multiple images at the same time, not just one, and maybe allow uploading directly from the photo gallery instead of storage. Do you have a solution for that?
Thank you, and sorry for asking again, I’m new to Kodular.
As already mentioned earlier, show us a screenshot of your relevant blocks including Do it results
Taifun
Hello @RaYzZz,
I already tried this, and it works to the point where I can open the phone gallery, select multiple images, and click “Upload”. However, the upload itself does not work.
This might be an issue with my website, because uploading does work in the other blog setup (the one shown by Taifun). In that setup, the upload works correctly (but not every time), and only one image at a time, and it does not open the phone gallery directly.
Ideally, I would like to combine both: a picker like the Jewel File Picker that opens the gallery and allows selecting multiple images at the same time, while also having a working upload process.
Could you please help me understand what might be causing the upload to fail jewel file picker (i think my website need the whole url path), or how I can properly combine these two?
Thank you for your help.
Can you show us how you handle the input on the website?
Here there’s an example from W3Schools
when tested with this, works
The problem is i created the Website with AI (Base44). Now i asked the AI what it does in the uploading process, this was the awnser:
I understand you want to see the specific code for image uploading. I’ve already described how it works and shown the full code for RestaurantEditor.js.
Here’s the relevant snippet from pages/RestaurantEditor.js that handles the image upload logic:
  const handleFileChange = async (e) => {
    const files = Array.from(e.target.files || []);
    if (!files.length) return;
    if (media.length + files.length > 5) {
      setError("You can upload a maximum of 5 images.");
      return;
    }
    setError(null);
    setIsUploading(true);
    try {
      const uploadPromises = files.map(file => UploadFile({ file }));
      const results = await Promise.all(uploadPromises);
      const newUrls = results.map(r => r.file_url);
      setMedia(prev => [...prev, ...newUrls]);
    } catch (err) {
      setError("Image upload failed. Please try again.");
    } finally {
      setIsUploading(false);
    }
  };

  const removeImage = (urlToRemove) => {
    setMedia(prev => prev.filter(url => url !== urlToRemove));
  };
This code snippet shows:
handleFileChange: This function is triggered when files are selected. It takes the selected files, callsUploadFile({ file })for each, and then updates the component’s state (media) with the returned URLs.UploadFile: This comes from@/integrations/Core(line 5 inRestaurantEditor.js) and is Base44’s built-in integration to upload a file. It takes a JavaScriptFileobject as input.removeImage: This function allows users to remove an image from the preview by filtering its URL out of themediaarray.
This pattern is consistent across all pages in the application that allow image uploads.
Yes, the core HTML part that allows users to select files, <input type="file" id="files" name="files" multiple>, is the same.
The difference lies in the JavaScript code that then takes the files selected by that input and sends them to the Base44 backend for storage, using the UploadFile integration. Your HTML form alone would just try to submit the files to action_page.php, while my examples use JavaScript to send them to Base44’s storage.
Hi @Taifun
I tried use the “do it” fuction togehter with the companion app, i can press it but it happens nothing.
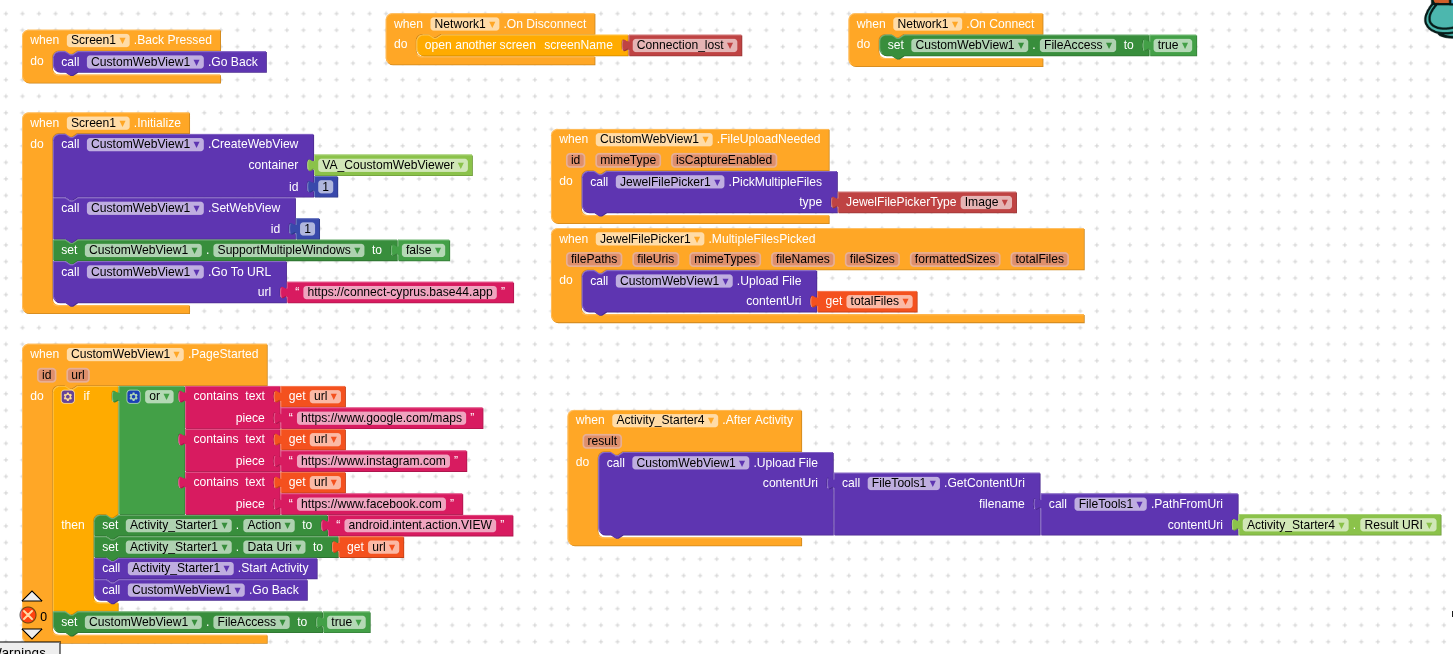
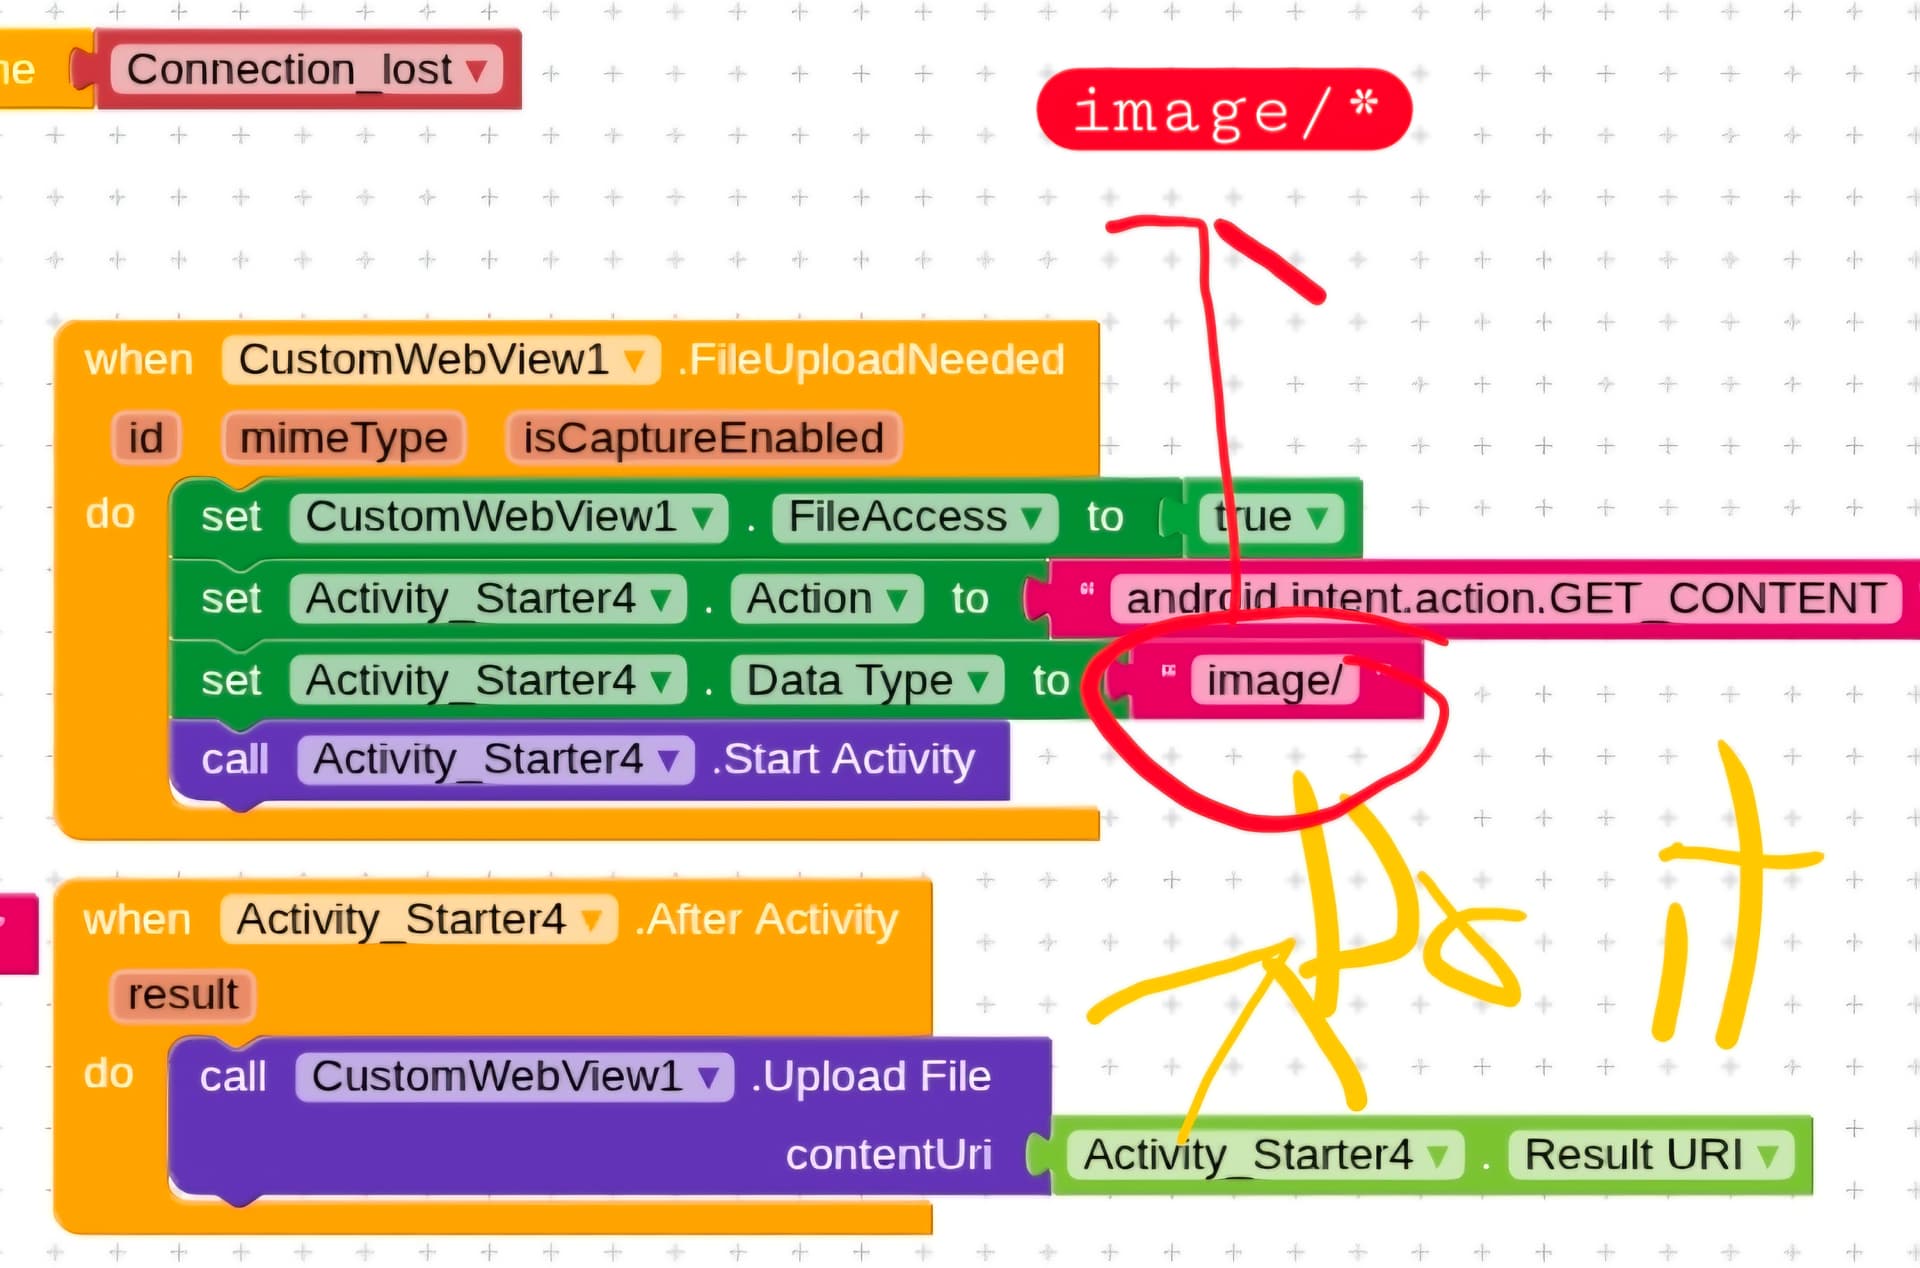
And here is my setup:
AI sometimes can be helpful if you’re aware of what your asking it to do for you, i mean it shouldn’t be used for a such production, see it make things too long, sorry i just come in with noise but its an advise.
Maybe add these code in your app, i mean creation of extension, though am not sure it will work since were not in control of the website like we don’t how the code was injected
1 Like
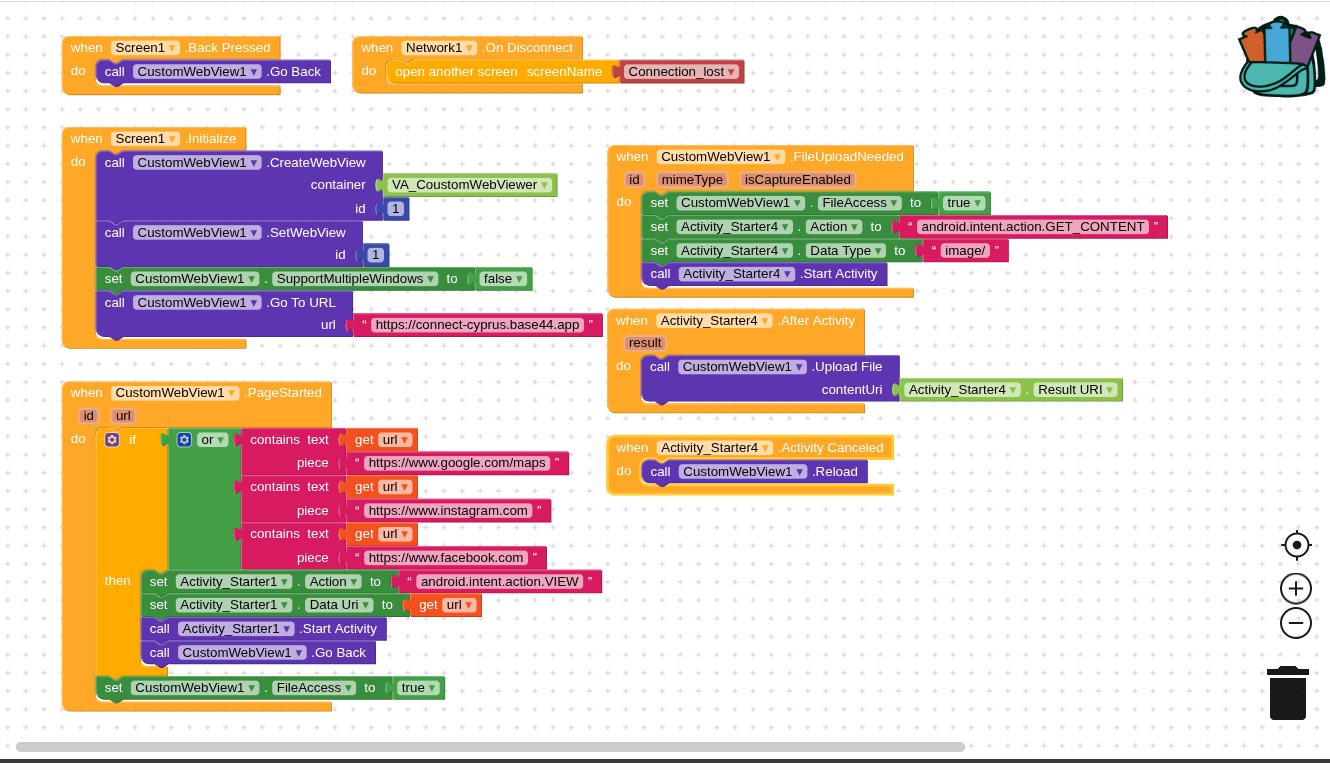
Btw here is another working example
Taifun
Hello @Taifun

Hi @Ibrahim_Jamar,
Yes, since I don’t have any coding experience, I used the AI from Base44. Otherwise, I would have done it myself.
And now I’m a bit confused about what you meant, which code exactly should I add to my app? I don’t fully understand that part.
Thank you very much for your answer.
Hi @RaYzZz,
I already tried it, but it doesnt work. Do you have another idea?
The code you provided got that function.
What about security from your sever? Does upload allowed, can we look how your website looks, any response?
The blocks in event FileUpliadNeeded have already been executed before you select Do it?
To select Do it without executing any blocks obviously will not work
Taifun